While I love to have my kids outdoors as much as possible, it is inevitable that stormy skies will visit our neck of the woods or that sometimes the sun is just too strong. For these times, I like to have some quiet activities that keep the kids busy, but not in front of a screen.
I was recently introduced to the lovely people at Duck Tape and found out that this product is just so much more than what I knew it as growing up. I’m sure by now you have heard of the cool wallets you can make, but the craft possibilities are endless!
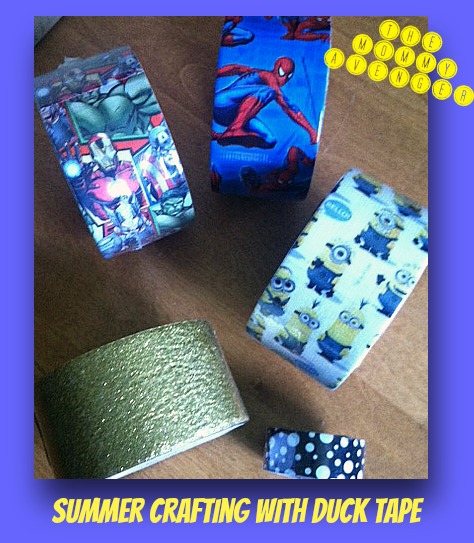
We received some of the cool new patterns–hello, Avengers, Spider-Man, and Despicable Me!–to try out and my kids have had a blast creating and using their imaginations. Recently my son created a super hero using mainly Duck Tape to decorate, it was awesome! I love that!
Duck Tape has tons of products beyond just colored tape. They have characters, patterns, glittery tape, as well as mini rolls, called Ducklings, collegiate prints, and even sheets of Duck Tape to make it easier to work with and cut into shapes. So many great options to choose from! You can find Duck Tape products at major retailers everywhere. You can also see them online.

Here are some projects to make with your kiddos–or just give them the directions and let them have fun!
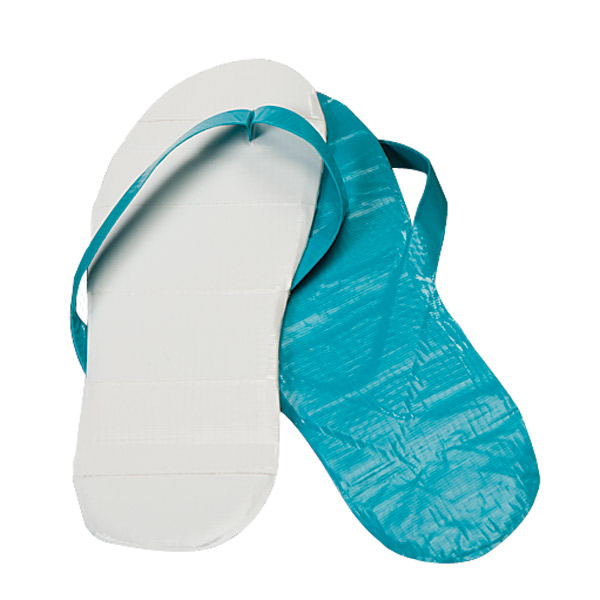
Duck Tape® Flip-Flops

If the shoe fits, make it out of Duck Tape®! By following these simple instructions, you can make Duck Tape® flip-flops for every occasion this summer.
Skill Level: Beginner
Approximate Crafting Time: 30 minutes
Supplies and Tools:
- Duck Tape®
- Cardboard
- Pen
- Flip-flops (to trace)
- Scissors
- Crafting board
Directions:
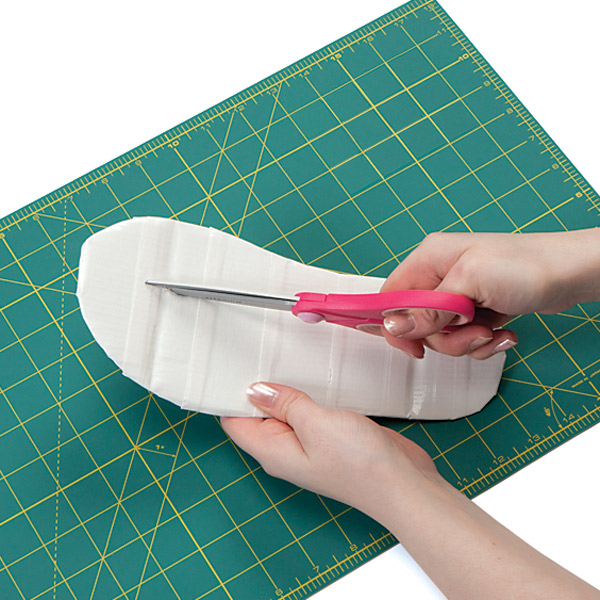
- Step 1: Trace your foot or a pair of flip-flips on cardboard to figure out what size shoe you’ll need to make.

- Step 2: Use your scissors to cut out your design.

- Step 3: Cover the cardboard in Duck Tape®. To ensure clean lines, start at the top and place the tape horizontally, folding over the excess tape on the bottom.

- Step 4: For the straps, cut a 14 in. long piece of Duck Tape® and fold it lengthwise sticky side to sticky side.

- Step 5: Cut a hole in the top of your flip-flop where your toe would be.
- Step 6: Thread the strip from step 4 through the hole and tape the middle of the strap to the bottom of the flip-flop.

- Step 7: Place the flip-flop on your foot to measure the length of the loops. Tape the strap ends to the bottom of the shoe.

- Step 8: Cover the entire bottom of the flip-flop with a layer of Duck Tape® and cut the edges to create a clean edge.

- Step 9: Repeat the steps to make a matching pair. You can decorate and personalize your flip-flops, too!
Duck Tape® Beach Bag
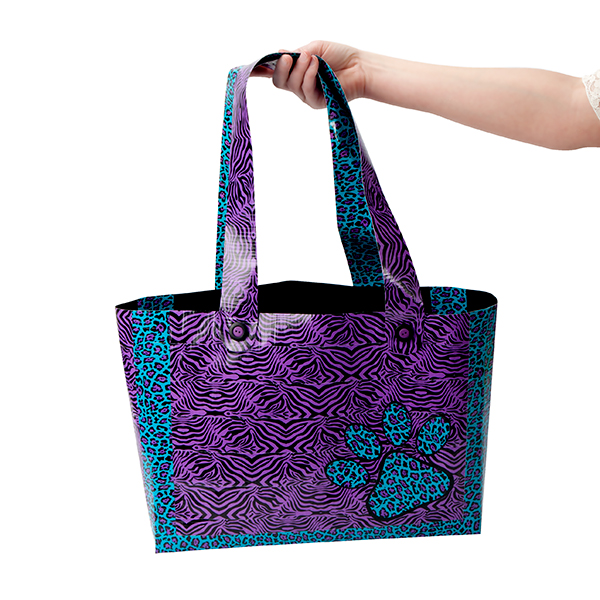
A Duck Tape® beach bag is a fun way to hold those sunny day essentials and show off your personal fashion. Use these techniques below or create your own look and you’ll be stylish anywhere you go this summer!
Skill Level: Advanced
Approximate Crafting Time: 1:20
Supplies and Tools:
- Color or printed Duck Tape®
- Scissors or craft knife
- Craft board
Directions:
- Step 1: Make 2 pieces of Duck Tape® fabric that are 16 in. long and 12 in. wide. These will be the front and back of your purse. Set these aside.
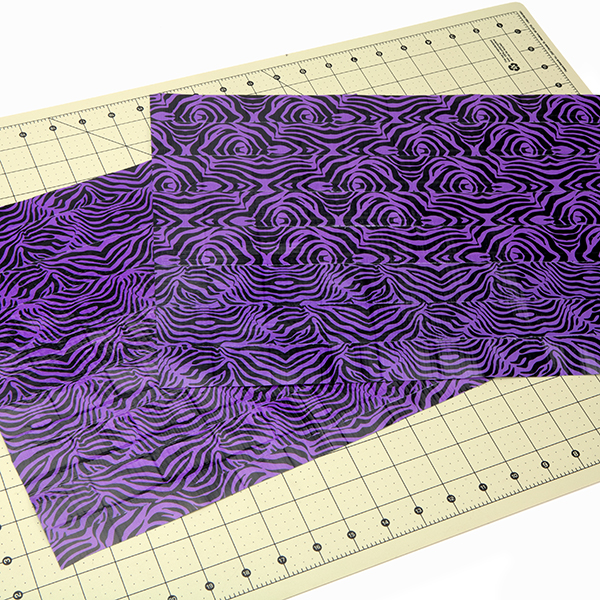
- Step 2: For your side pieces, make 2 more pieces of Duck Tape® fabric that are 12 in. long and 5 in. wide. Set these aside.

- Step 3: Make a final piece of Duck Tape® fabric that is 16 in. long and 5 in. wide. This will be the bottom of the purse. Set this aside.

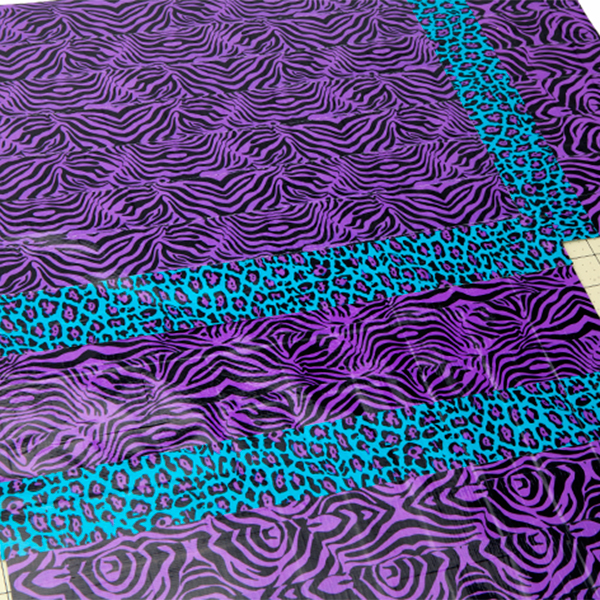
- Step 4: Lay out the 2 side pieces from step 2 with one of the pieces from step 1. Use 12 in. strips of Duck Tape® to attach them together on both sides. This will be the front and sides of your bag. Set this aside.

- Step 5: Lay out the second piece from step 1 and the piece from step 3. Use a 16 in. strip of Duck Tape® to attach them together on both sides. This will be the back and bottom of your bag.

- Step 6: Lay out the bottom piece from step 5 in between the front and back piece. Use a 16 in. strip of Duck Tape® to attach them on both sides.
- Step 7: Fold all the sides up to create your bag and tape all the remaining seams inside and out.
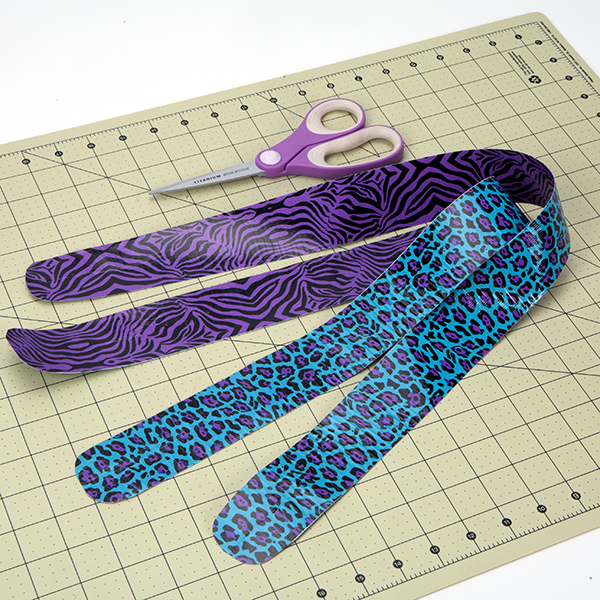
- Step 8: For your straps, make two double sided strips of Duck Tape® that are 24 in. long. Round off the edges if desired.
- Step 9: Connect the straps to the front and back of your bag with strips of Duck Tape®. Add other accessories or material to decorate if desired.
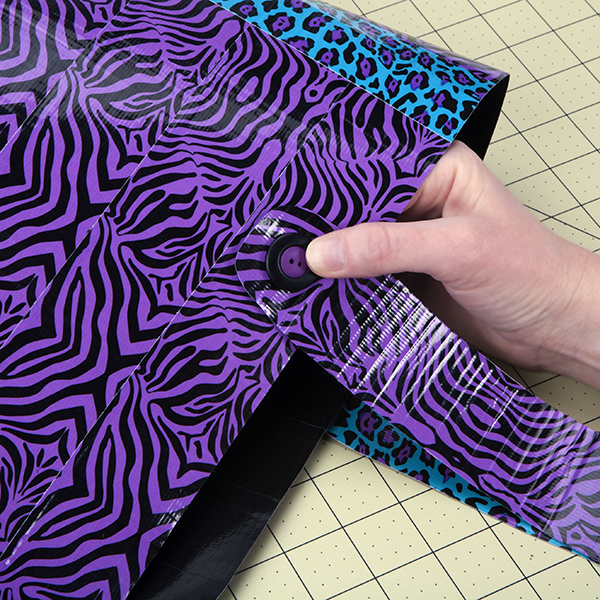
- Step 10: Add your own design and personal style to the outside of your bag!


Leave a comment